#ASKColleen - Third Edition
How should I moisturize in the morning? What order should I apply serums? How does Retin A fit into my skincare routine? Colleen covers it all...

If you’re anything like me – you have a million lists. I have grocery lists, appointment reminders, and meeting notes spread across my phone, laptop, and a stack of Post-it notes stuck at the bottom of my purse.
I decided that getting organized would be my number one New Year’s resolution for 2017. Step one in achieving that goal: Start a bullet journal. BUJO for short.
You’ve maybe seen the term bullet journal floating around social media lately, and at first glance, it can be intimidating. Just think of it as a catchall notebook that combines your to-do lists with a personal journal. My sister mentioned the idea to me, so we started going back and forth talking about all the ideas we had to start journaling about.
After a few weeks of bullet journaling, I feel like my life has changed! No more searching for lost sticky notes!! So I thought this would be great opportunity to share the setup for my bullet journal with you all.

Step 1 – Gather supplies.
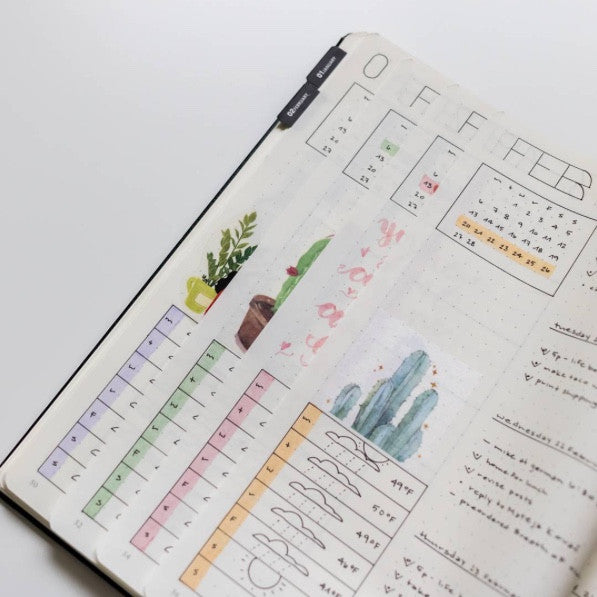
I did a bit of research on the best notebook suited for bullet journaling. The one that I have is this Leuchtturm1917 notebook. I love that it already has pages set up for you table of contents (we’ll talk about that next), and the pages are numbered (which is a major time saver). This particular one also has dotted pages, which makes it super easy to draw little charts for your collections (more about collections in Step 4).
If you’re a perfectionist like me, you will definitely want a clear 6-inch ruler to help connect those dots. Overall, this notebook is the perfect size to toss in my tote bag and take on the go, and the 2 built-in bookmarks always save my place.
There are lots of other accessories that you can collect for your bullet journal – like Washi tape and themed stickers. My sister sent me a package of elephant stickers that I absolutely LOVE! (You can read about my obsession with elephants in my blog about our African safari.) I also love using artist pens for my journal, like 4 pack of Faber Castell pens that come in a variety of tips.
Before getting started, I also recommend checking out the hashtag #BulletJournalJunkies on Instagram. Or find all kinds of cool inspiration and tips on my Bullet Journal Ideas Pinterest board.
And of course check out Ryder Carroll, the creator of the bullet journal concept, and his “How To” video that explains BUJO basics. Carroll has his own bullet journal that's available on his website.
 photo courtesy of https://www.instagram.com/daintilynoted/
Step 2 – Set up your index.
Page one of your bullet journal should be your table of contents, a quick reference that lists your sections and page numbers. This page will evolve over time, so be sure to leave plenty of room for your journal to grow.
You’ll also want to include a key for the different types of bullet points – hints the name “bullet” journal! Here’s a quick look at my bullets…
O - event
. - to do
- – notes
> - migrated (not completed and moved to another day)
x – completed
If you have a commitment phobia and you’re nervous about starting your bullet journal, outline your pages with a pencil first before going over it with a more permanent pen.
Step 3 – Outline your calendar.
There are lots of different methods to setting up the “planner” portion of your bullet journal. And there are a million ideas and templates to draw inspiration from on Instagram and Pinterest. For me, what works best is to move from a yearly to monthly to daily.
-Yearly: Is my year at a glance. This is a great place for reoccurring events like birthdays, holidays, and anniversaries.
-Monthly: Is your traditional monthly planner. This is where I plan promotions for my business and upcoming events like weddings, conferences, or travel plans.
-Daily: Is the fun part! I combine my daily tasks with meeting notes, appointments, and to-dos like my grocery list. It’s also a place to reflect on the day and keep an actual journal of my life. An example day may look like…
0 – Breakfast with my husband
X – New product information meeting at 11:00am
-Meeting notes on page 12
. – Remember to send Bailey a Clarifying Detox Mask
- – Took Harley (my puppy!) for a haircut.
. – Grocery List
- Sparkling Ice Water, Pomegranates, Pistachios, Puppy food
0 – Watched Young Pope on HBO before bed (my current favorite!)
You can see how easy it is to combine all of the aspects of my life – to-do lists, appointments, and little things that I want to remember onto one single page. I love that it feels organized and simplified but still detailed.
Step 4 – Plan your collections.
This is my absolute favorite part of my bullet journal because it can really morph into whatever you need it to be.
Some pages are just simple lists with things I want to remember - like books I want to read, movies to watch, and things to be grateful for. Some pages are more like long-term to-do lists that I can check off as I complete - like renovation projects in my home or ideas that come to me in the middle of the night for a new skincare product. (Yes – I have SO MANY new product ideas for 2017 that I need to keep a multi-page list! Stay tuned!!)
Others are reminder lists – for example, I keep a list of things I order while online shopping with the estimated arrival date and a bucket list of travel destinations. One of my favorite lists is a section of inspirational quotes that I jot down as I find them.

Some of my collections are like trackers – I keep count of my steps taken, calories burned, and how many glasses of water I drink per day. (Always shooting for eight 8oz glasses!) Setting goals is the easy part, and keeping track of my progress with my bullet journal helps keep me motivated.
If you’re looking for an even more in-depth explanation of the bullet journal method, this is a great article!
- - -
I’d love to hear about your organization solutions or if you have any experience with bullet journaling. Have any tips or tricks for me? Leave them in the comments below!
xo
Colleen
0 comments